Table of Contents
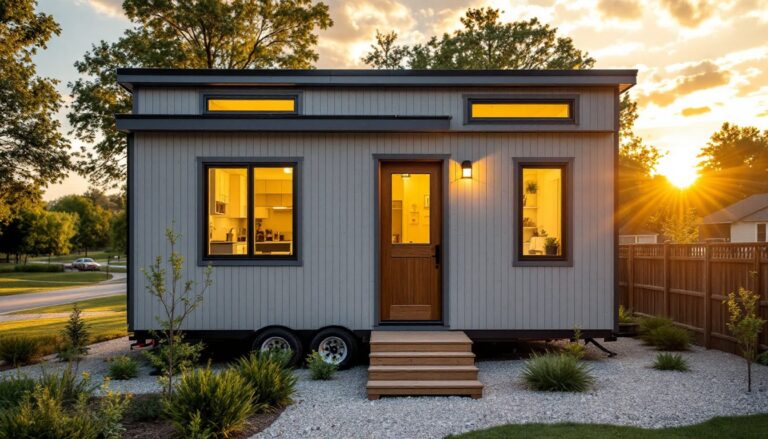
ToggleWhen square footage is precious, the bathroom becomes a design battlefield. A tiny house shower doesn’t have to feel cramped or cheap, it just needs smart planning. Whether you’re outfitting a 400-square-foot cottage, a mobile home, or downsizing by choice, the right layout, fixtures, and finishes can transform a closet-sized bathroom into a functional, even pleasant space. This guide walks through the practical decisions that separate a shower that works from one that feels like a phone booth.
Key Takeaways
- A well-designed tiny house shower prioritizes smart layout choices (3×3, 2.5×5, or corner configurations) that work within limited space rather than against it.
- Corner showers with neo-angle enclosures and proper waterproofing—including correct slope and epoxy grout—prevent common failures like water pooling and mold in compact bathrooms.
- Space-saving fixtures like 2.5 GPM showerheads, handheld rail-mounted heads, and recessed soap niches deliver functionality without visual clutter.
- Frameless glass enclosures and chrome finishes in a tiny house shower reduce maintenance while maximizing the sense of openness in confined areas.
- Strategic storage solutions—recessed shelving, magnetic strips, under-sink cabinets, and wall-mounted dispensers—eliminate clutter and improve livability without consuming floor space.
Why Shower Design Matters In A Tiny House
In a compact home, the shower isn’t just another fixture, it’s often the most water-intensive and spatially demanding element in the bathroom. Get it wrong, and you’ll live with water pooling on the floor, mold creeping into corners, or a layout that forces you to contort like a gymnast just to rinse off.
The stakes are higher in tiny spaces because there’s no room for trial and error. A poorly drained corner shower in a 60-square-foot bathroom will announce its mistake every morning. Similarly, an oversized enclosure or the wrong door swing can block the toilet, sink, or entrance entirely. Smart tiny house shower design means choosing layouts that work with your dimensions, not against them.
Properly planned showers also improve resale value and livability. A thoughtfully designed bathroom, even a small one, signals competence to future buyers and keeps the current resident from feeling like they’re living in a converted closet.
Compact Shower Layouts That Maximize Space
The footprint of your shower dictates everything that comes after. In tiny homes, you’re typically working with 3 feet by 3 feet, 2.5 feet by 5 feet, or occasionally the awkward L-shaped corner that’s all the budget allows.
Rectangular layouts (2.5 feet by 5 feet or 3 feet by 4.5 feet) are the workhorse of tiny bathrooms. They fit along a single wall, leaving the rest of the bathroom functional. The trade-off: you’re standing in a slot, but at least you’re not climbing over the toilet to get in.
Angled corners work when your bathroom is irregularly shaped. A 36-inch or 42-inch corner shower pan fits snugly into a tight corner and opens toward the room. This layout eats into total floor space less noticeably because the dead corner space is now doing a job.
Shower over tub combos save square footage by combining two fixtures, though they sacrifice the experience of a true shower. Useful if you occasionally need to bathe a small child or pet, but cramped if your primary goal is a refreshing shower. Ensure your ventilation and waterproofing are top-notch here, tub combos leak more readily than dedicated showers.
Corner Showers And Pedestal Options
Corner showers are the tiny house default for good reason. A neo-angle shower enclosure (35-inch or 42-inch corner units) fits into the junction of two walls, consuming less total floor area than a rectangular shower jutting out from a single wall. The corner pan sits at 45 degrees, giving you slightly more elbow room than you’d expect.
When framing a corner shower, use 2×4 studs to build the enclosure walls. Ensure the subfloor can handle the weight and water drainage, a mortar bed with a proper slope (1/4 inch drop per foot toward the drain) is essential. Half the failure rate in tiny bathrooms comes from ignoring this slope and watching water pool.
Curbless or low-curb showers save space and look modern, but they require precise grading and experienced waterproofing. A 2-inch curb is safer for DIY work because it’s more forgiving than near-zero curbs that demand flawless slope and tile work. If you’re not confident in slope work, stick with a modest curb.
Pedestal-style or corner sink options free up wall space above the shower area. Instead of a vanity cabinet that blocks sightlines, a wall-mounted sink or corner pedestal keeps the bathroom feeling open. Pair this with a corner shower, and suddenly a 30-square-foot bathroom feels somewhat breathable.
Space-Saving Fixtures And Materials
Every fixture in a tiny shower has to earn its square inch. A standard showerhead sprays a wide arc, useful in a roomy bathroom, wasteful in a tight one. A 2.5 GPM (gallons per minute) showerhead meets modern efficiency codes and uses less water than older heads, which often flow at 5+ GPM. In a tight space, this reduction barely changes pressure perception but shrinks water usage by half.
Handheld showerheads are practical for tiny bathrooms because you control the spray direction and intensity. Mount it on a sliding rail so it adjusts to your height and your guest’s height. A single handheld head plus a fixed wall head gives flexibility without bulky multijet systems.
Wall-mounted soap niches (12 inches wide, 4 inches deep) beat shelf clutter. A single recessed niche in the shower wall costs less than $50 and eliminates the trap that corrodes and molds on a ledge. If you’re tiling the shower yourself, a niche is straightforward: frame it during rough-in, and embed a trim ring as you tile.
Small-format tiles (4×4 or 6×6 inches) work better than large sheets in tiny showers because they conform to curves and corners with less cutting waste and fewer visible grout joints. Larger tiles (12×12 or bigger) look modern but demand flawless walls, a curve or bend shows as a gap. Stick with 4×4 or 6×6 in a DIY tiny shower.
Grout and sealant matter. Use an epoxy grout or urethane-modified epoxy instead of cement grout: it resists mold and water absorption better in perpetually damp corners. Yes, it’s harder to apply, but in a space where moisture is inevitable and space is precious, better sealing is worth the effort.
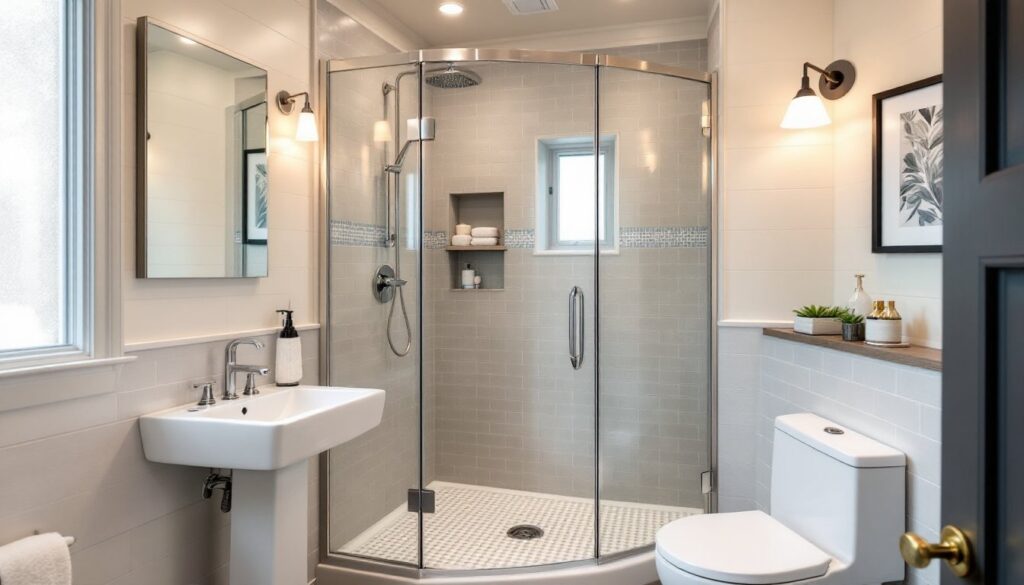
Glass Enclosures And Minimalist Hardware
Frameless glass enclosures look less cluttered than framed doors and don’t trap water or mold in aluminum channels. A single glass panel (36 inches wide, 78 inches tall) fits most corner showers and costs $200–$400 installed. Compare that to a framed enclosure at similar size, and frameless edges out by only $50–$100, worth it for cleaner aesthetics and easier cleaning.
Chrome and stainless steel fixtures hide water spots and mineral deposits far better than brushed nickel or matte finishes in a high-humidity bathroom. Choose finishes that hide fingerprints and water marks, not because they’re luxurious, but because you’ll clean them less and they’ll look maintained longer.
Single-lever mixing valves use less wall space and fewer penetrations than separate hot/cold handles. They also reduce the chance of scalding if children are present. Mount the valve body inside the wall (roughed in before drywall) so only the trim plate and lever show, maximizing usable wall area.
Storage Solutions For Tiny Bathrooms
A tiny shower with nowhere to stash soap, shampoo, and razors forces you to choose: leave clutter visible or store everything elsewhere and fetch it each time. Neither works long-term.
Recessed shelving above the toilet (24 inches wide, 12 inches deep) tucks bottles and rolls out of sight without eating floor space. Frame it during rough-in, drywall around it, and tile or paint to match. Cost: $30–$50 in materials, 2 hours labor.
Magnetic strips on the shower wall hold metal razors and tweezers without requiring shelf space. Stainless steel or powder-coated strips cost $15–$30 and last years without corrosion in the wet environment.
Over-the-door organizers or corner caddy units are temporary but effective. A rust-resistant corner tension pole with shelves adds 2–3 shelves in minimal footprint. These are portable, so if you rent or plan to resize the bathroom later, they come with you.
Under-sink cabinetry with a small footprint (24 inches wide) keeps grooming products and cleaning supplies organized without wall mounting. Soft-close hinges prevent slamming in a compact space, and a pull-out drawer organizer lets you access bottles without unloading everything. Designers featured on Remodelista often use modular under-sink systems for tight bathrooms, and it’s a tactic that works in real tiny homes too.
Wall-mounted toothbrush holders and soap dispensers eliminate counter clutter in favor of clean wall space. Choose adhesive-mounted versions if you rent, or drill-mounted if you own. Either way, they’re invisible until you need them. Guides from Family Handyman emphasize mounting height: position soap dispensers 36–42 inches above the floor for comfortable reach while showering.
Conclusion
A tiny house shower doesn’t require compromise on function, it requires precision in planning. Choose a layout that fits your footprint, spec fixtures that work efficiently in tight quarters, and invest in waterproofing and ventilation that prevent the mold and rot that turn small spaces into problems. The difference between a shower that frustrates and one that simply works is usually just smart decisions made upfront, not money spent. Apartment Therapy celebrates hundreds of small-space bathrooms that prove tight quarters can feel intentional, even pleasant, when the design respects the limits.