
Table of Contents
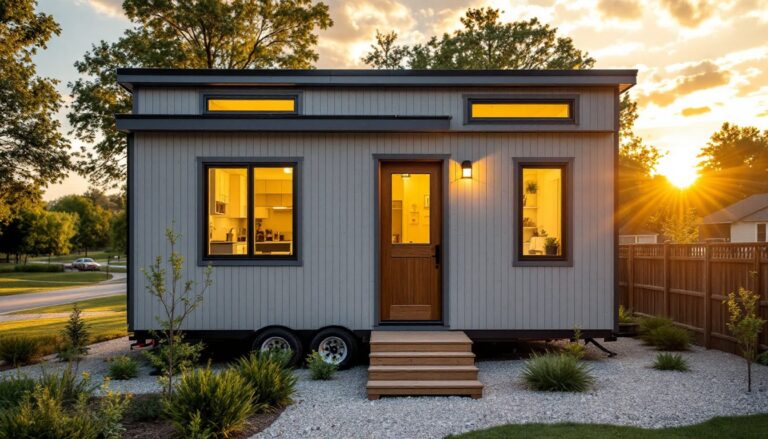
ToggleA 12×20 tiny house offers 240 square feet of living space, small enough to fit a modest lot or be towed on a trailer, yet large enough to function as a full-time residence or investment property. Whether you’re building from scratch, renovating an existing structure, or simply exploring the tiny house movement, getting the layout and design right from the start saves headaches and money down the road. This guide covers the practical steps to design, build, and optimize a 12×20 space that works hard and feels less cramped than its square footage might suggest.
Key Takeaways
- A 12×20 tiny house provides 240 square feet of functional living space ideal for full-time residence or investment, with the key to success being smart layout planning that separates sleeping, living, kitchen, and bathroom zones without wasting hallway space.
- Vertical storage, light colors, mirrors, and built-in multi-functional furniture are essential design strategies that prevent cramped feelings and maximize usable space in a 12×20 footprint.
- Building codes require 7-foot minimum ceiling heights, egress windows in sleeping areas, proper ventilation systems, and smoke/carbon monoxide detectors—all mandatory for occupancy and safety.
- Fixed foundation construction for a 12×20 tiny house ranges from $21,000–$41,000 with DIY labor or $40,000–$80,000+ with contractor work, with foundation and structural elements being non-negotiable expenses.
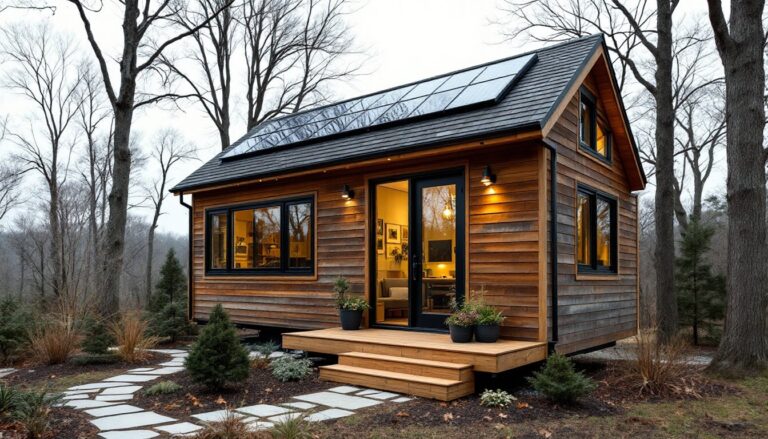
- Mobile tiny houses on trailers face stricter zoning restrictions and require engineered frames and axles, making fixed foundations a more straightforward path for most jurisdictions.
- Consistent flooring throughout, layered lighting (recessed, task, and ambient), and restraint in decor create a cohesive interior that feels intentional and less cramped than its square footage suggests.
Understanding The 12×20 Tiny House Layout
A 12×20 footprint gives you roughly 240 square feet to work with, think of it as about one-third the size of a standard one-bedroom apartment. The linear nature of 12 feet width is the constraint that shapes everything else. Most successful 12×20 layouts divide the space into a sleeping area, living zone, kitchen, and bathroom without wasting hallway space.
The sleeping nook or lofted bedroom typically claims 80-120 square feet and sits at one end, leaving the remaining 120-160 feet for living, cooking, and sanitation. If you’re adding a mezzanine or sleeping loft, your ceiling height needs to be 9 feet or taller for the main floor, standard framing (8-foot walls plus floor and roof structure) may force you to choose between a loft and comfortable living headroom below it.
Traffic flow matters immensely in tight quarters. A central kitchen island or galley layout prevents bottlenecks, and positioning the bathroom near utilities (if stacked plumbing is possible) cuts build costs. The 20-foot length works better than width because it lets you read the space as a sequence, enter, move through zones, reach the bedroom without crossing the living room repeatedly.
Building codes require minimum ceiling heights (typically 7 feet, with some exceptions for lofts), and egress windows or doors are mandatory in sleeping areas for fire safety. Check your local IRC (International Residential Code) or municipal amendments before finalizing the layout.
Space-Saving Design Essentials For Tiny Living
In a 12×20 space, every square inch must earn its place. The difference between cramped and functional is often 2-3 smart design choices.
Vertical storage is non-negotiable. Use wall-mounted shelving, pegboards, and ceiling-hung racks to move clutter off the floor. Floating shelves are cheaper to install than built-ins and can hold dishes, books, or decor without adding bulk. Wall anchors rated for 25-50 lbs per anchor (depending on drywall type and stud proximity) suffice for most shelving. Mount shelves at 12-16 inches apart if you’re stacking items, and secure them to studs when possible, use 2.5-inch wood screws into studs for solid anchor points.
Color and light amplify perceived spaciousness. Light paint (whites, soft grays, pale blues) reflect light and make rooms feel larger: dark colors absorb light and shrink the visual space. A single accent wall or darker color on the floor (darker flooring grounds the space without overwhelming it) provides depth without closing in the room. Windows, or the illusion of them through mirrors, bounce light around and make 240 square feet feel less like a box.
Built-in furniture, while requiring upfront construction, often outperforms freestanding pieces because they don’t float in the middle of the room, creating visual clutter. A built-in bench with storage underneath the kitchen counter, a bed platform with drawers, or a window seat that doubles as storage reclaims space that a separate dresser or storage unit would steal.
Multi-Functional Furniture And Storage Solutions
Every furniture piece should do double or triple duty. A dining table that extends or drops down for meal prep and then folds away saves space. Kitchen islands with open shelving below provide work surface and storage. Ottomans with removable tops hide blankets, tools, or seasonal items. Murphy beds (whether full-size or queen) flip up to the wall when not in use, freeing 40-50 square feet of floor space during the day.
Bed platforms with built-in drawers underneath cost more to build but eliminate the need for a separate dresser, you’re using vertical airspace that would otherwise be wasted. Install heavy-duty drawer slides (rated for 100+ lbs) rated for bottom-mounted installation if you want smoothness without binding. A wooden frame with 2×6 or 2×8 lumber provides rigidity and handles the weight.
Wall-mounted desks (12-24 inches deep) fold down for work and fold up out of the way. A small pull-out pantry (18-24 inches wide) tucked beside the refrigerator stores dry goods without claiming floor real estate. These solutions are marketed as “apartment-friendly” and range from $50-300 depending on quality and whether you build or buy them.
Building And Construction Considerations
Building or framing a 12×20 structure requires understanding load-bearing walls, foundation requirements, and whether you’re constructing a fixed structure or mobile tiny home. If building on a foundation (concrete slab, stem wall, or pier-and-beam), you’ll need proper drainage, frost-protected footings, and local building permits. Most jurisdictions require a licensed contractor or engineer sign-off for residential construction, even on tiny homes.
Framing follows standard residential practices: 2×4 studs on 16-inch centers (or 24-inch for faster work) along the perimeter and interior walls, double top plates for rigidity, and 2×6 or 2×8 joists for flooring depending on span and load calculations. If you’re designing a lofted bedroom, the support beam or posts for the loft need to carry the load, use lumber-sizing software or consult Fine Homebuilding’s advanced construction techniques to ensure studs and joists meet code.
Mobile tiny houses on trailers have different requirements: the frame, axles, and hitch must be engineered for towing, and many jurisdictions don’t yet have zoning allowances for occupied trailers. RV codes sometimes apply, which are less stringent than residential codes but come with trade-offs in materials and durability.
Insulation, air sealing, and moisture management are critical in a tiny space. Poor ventilation traps humidity and causes mold. Install a bathroom exhaust fan (at least 50 CFM, vented outside, not recirculating) and kitchen range hood vented to the exterior. Insulate walls to at least R-13 (2×4 cavity), the roof to R-30-R-38 depending on climate. Use moisture barriers correctly: polyethylene sheeting on the warm side of insulation in cold climates prevents condensation inside the wall cavity.
Safety-critical items: install a smoke detector in the sleeping area and main living space (battery-powered or hardwired), a carbon monoxide detector near any fuel-burning appliances, and ensure electrical circuits are protected by GFCIs (ground-fault circuit interrupters) in kitchens and bathrooms per NEC code. Permit inspectors check these, and they’re non-negotiable for occupancy.
Interior Design Tips For A Cohesive 12×20 Space
Designing a cohesive interior in 240 square feet means treating it as one open flow rather than isolated rooms. A consistent flooring type throughout (wood-look vinyl, hardwood, or polished concrete) visually expands the space. Mixing three different flooring types in such a small footprint fragments the eye and makes it feel choppy.
Furniture arrangement dictates how livable the space feels. Float seating away from walls (a sofa facing a TV mounted on the opposite wall, angled slightly inward) creates an intentional living zone even if the bedroom is just 8 feet away. Open shelving in the kitchen, rather than closed upper cabinets, prevents a tunnel effect, though it requires disciplined styling (no clutter, coordinated dishware and containers visible).
Lighting layers matter more in tight quarters. A single overhead fixture casts harsh shadows and feels utilitarian. Install recessed lights on a dimmer (4-6 fixture minimum for 240 sq ft, spaced 4-6 feet apart), add under-cabinet task lighting in the kitchen (LED strips, 12-24V, are cheap and effective), and use floor or table lamps in the living zone. Each layer can be adjusted, bright for cooking, dimmed for evening, which psychologically expands comfort.
Decor should reflect the resident’s personality, but restraint wins in small spaces. Apartment Therapy covers small space living ideas and demonstrates how a few well-chosen pieces outperform clutter. One statement piece (a colorful rug, a gallery wall, a live-edge shelf) anchors the design: surrounding items stay neutral. Too many competing colors or textures feel chaotic in 240 square feet.
Storage visibility is part of the design. Open shelving shows off a curated collection: closed cabinets hide everything. Mix both: open shelving for daily-use items and decor, closed storage for clutter that doesn’t add to the aesthetic.
Cost Breakdown And Budget Planning
Cost per square foot for tiny homes varies wildly based on whether you DIY, buy pre-built, or hire a contractor. A rough framework for a 12×20 fixed tiny home on a foundation:
Foundation & Site Work: $3,000–$8,000 (slab, drainage, grading).
Framing & Structural: $4,000–$7,000 (lumber, hardware, labor if hired).
Roof, Windows & Doors: $2,500–$4,500 (roofing material, flashing, three windows, one exterior door).
Electrical & Plumbing: $3,000–$5,000 (service panel, wiring, rough-in: finish work pushes this higher).
HVAC & Ventilation: $1,500–$3,000 (mini-split heat pump, ductwork, or wall-mounted AC).
Interior Finishes: $4,000–$8,000 (drywall, paint, flooring, cabinet or shelving).
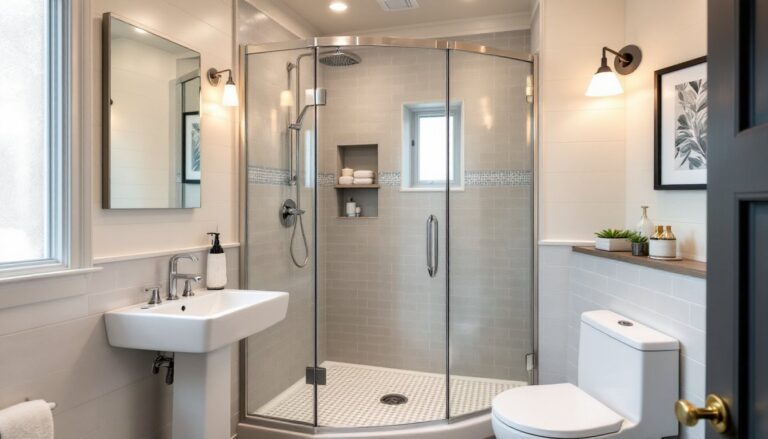
Kitchen & Bath: $2,000–$4,000 (fixtures, vanity, basic appliances, upgrading increases cost significantly).
Miscellaneous: $1,000–$2,000 (permits, inspections, contingencies).
Total Estimate: $21,000–$41,000 for a basic, functional tiny home if you DIY labor, or $40,000–$80,000+ if you hire contractors for most work. Real Simple’s home organization approach emphasizes smart spending and avoiding waste, principles that apply here too: a $200 custom shelving unit isn’t worth it if a $50 IKEA solution does the job equally well.
Budget priorities: foundation and structural work can’t be cut: use simpler finishes (paint instead of wallpaper, vinyl instead of hardwood, standard fixtures instead of luxury) to save elsewhere. Buying used appliances, reclaimed wood, or salvage materials trims costs 15-30%, but factor in time hunting deals.
Conclusion
A 12×20 tiny house is an achievable project that forces discipline in design and construction but rewards you with an efficient, affordable living space. Success hinges on understanding the layout before you build, choosing multi-functional designs, and respecting building codes and safety standards. Whether you’re building on a fixed foundation or a mobile platform, the fundamentals remain: smart space planning, vertical storage, thoughtful finishes, and honest budgeting. Start with a clear sketch, visit local code officials, and build to last.